
Early access · Release date: March 24, 2025
UpdatedSchedule I Production Guide: Bungalow to Automation
Use this Schedule I production guide to plan your bungalow, assign employees, connect mixing stations, and fix bottlenecks before expanding your operation.
Jump to

How Do You Automate Production in Schedule I?
Build a midgame production line in Schedule I around 12 pots, four drying racks, two Mixing Station MK2 units, and one Packaging Station MK2. Assign two botanists, one chemist, and one handler, with an optional cleaner. The core rule of this Schedule I production guide is to automate every transfer and keep supplies stocked.
The bungalow gives you room to separate growing, mixing, and packaging.
| Production stage | Equipment | Employee assignment |
|---|---|---|
| Growing | 12 moisture-preserving pots, 12 suspension racks, and 12 grow lights | Two botanists, each handling six pots |
| Drying | Four drying racks | Two racks per botanist |
| Mixing | Two Mixing Station MK2 units | One chemist operating both stations |
| Packaging and transport | One Packaging Station MK2 and dedicated storage | One handler packaging and supplying the line |
| Cleanup | Trash bin covering the growing area | One optional cleaner |
Build the chain in this order:
Pots → drying racks → dried-product storage → first mixer → second mixer → unpackaged-product storage → packaging station → finished-stock storage
Every arrow needs either an employee-managed destination or a handler route. Equipment placement alone does not connect the factory.
Official page: Schedule I (scheduleonegame.com)
Choose One Product and Fund the Supply Loop
Start with one base product and a short mixing sequence. Each additional mixing step needs ingredients, storage, processing time, and transport. A complicated recipe can occupy the bungalow before you have enough capacity to keep it moving.

For this layout, use a cannabis product with two mixing steps. The compact chain leaves space for drying racks and keeps ingredient deliveries manageable.
A two-step Sour Diesel mix
One bungalow recipe uses these in-game mixing steps:
- Grow Sour Diesel.
- Mix the harvested product with Iodine.
- Mix that intermediate product with horse semen.
- Package the finished mix.
Keep the ingredient order consistent. Before filling your shelves, make a small batch and inspect the resulting product in your save. Schedule I includes a seeded mixing setting, added in v0.4.5, so check that setting when reproducing recipes.
Keep operating money available
Aim for a setup budget around $25,000, with money reserved for supplies and wages. Spending everything on stations leaves the factory unable to complete its next cycle.
Stock these items before starting:
- Seeds for your selected strain.
- Soil on each botanist’s assigned supply shelf.
- Both mixing ingredients on separate shelves.
- Your chosen packaging near the packaging station.
- Cash for employee wages.
Extra-Life soil lasts three grow cycles, compared with two for Long-Life soil and one for Standard soil. Use the longer-lasting option to reduce how often you replace soil stock.
Keep recipe ingredients separate from miscellaneous inventory. A shelf dedicated to one ingredient makes shortages easier to spot and transport routes easier to inspect.
Arrange the Bungalow Around the Production Flow
Divide the bungalow’s three rooms by task. Keep doorways open and leave employees enough room to reach the working sides of stations and storage.

Growing room
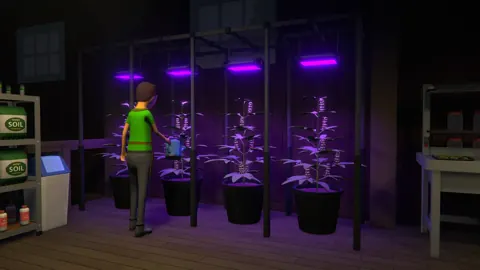
Place the 12 pots around the walls with their suspension racks and lights. Put the four drying racks nearby so botanists can move harvests without crossing the entire property.
Divide the pots into four groups of three, with each group feeding one drying rack.
Position a trash bin so its coverage includes the growing area. If you hire a cleaner, assign the growing room’s trash bin to that employee.
Mixing room
Place the two mixers close enough to form a clear processing sequence. Keep their ingredient shelves nearby, along with the storage receiving dried harvests.
Leave access around both stations. The Mixing Station MK2 became slightly larger in v0.4.3, so preserve working space when adapting older layouts.
Packaging and employee area
Put the packaging station near three separate storage points:
- Unpackaged finished product.
- Empty packaging.
- Packaged stock ready to collect.
Use employee lockers when setting up staff. Older layouts filled this room with beds; employee assignment now uses lockers. Keep their access clear alongside the packaging route.
Rename stations and storage through the management clipboard. Labels such as “Dried Sour Diesel,” “Mixer 1 Ingredient,” and “Ready for Sale” make destination mistakes much easier to catch.
Storage closets unlock at Bagman I and hold more item slots than the older storage racks. Use them when additional storage capacity becomes useful, while retaining clearly separated supplies and outputs.
Assign Employees and Connect Every Route
Open the management clipboard to assign employees, workstations, supply sources, and destinations. Since v0.4.6, the object selector supports multiple selections by default; holding Shift is no longer necessary.
 Image: Steam / TVGS
Split growing duties between two botanists
Assign each botanist:
- A locker.
- A supply shelf containing the correct seeds and soil.
- Six pots.
- Two drying racks.
Set the selected seed on all 12 pots, then configure each group of three pots to send its harvest to the appropriate drying rack.
Finally, set all four drying racks to deliver their completed output to the dried-product storage shelf.
Assign the chemist to both mixers
Give the chemist a locker and assign both Mixing Station MK2 units.
Configure their destinations:
- First mixer → second mixer.
- Second mixer → unpackaged-product storage.
The chemist handles processing and the configured output transfers. Your handler supplies the ingredients that make those jobs possible.
A chemist can manage four workstations, so this two-mixer build leaves assignment capacity available. Physical space and supply flow still determine whether adding stations helps.
Give the handler five transport routes
Assign the handler to the Packaging Station MK2, then create these routes:
| Route | Pickup | Destination |
|---|---|---|
| 1 | Dried-product storage | First mixer |
| 2 | Iodine storage | First mixer |
| 3 | horse semen storage | Second mixer |
| 4 | Unpackaged-product storage | Packaging station |
| 5 | Packaging supply storage | Packaging station |
Set the packaging station’s output destination to your finished-stock shelf.
These routes complete the gaps between employee duties. Botanists deliver dried harvests, the chemist advances the mix, and the handler supplies stations and packages the final product.
Fund employees before expecting work
Keep wage money in each assigned employee’s payment storage. An employee with correct assignments still needs payment.
At startup, let botanists establish the harvest supply before funding processing staff who have nothing to process. Activate the rest of the line when dried product reaches its input shelf.
For the optional cleaner, assign a locker and the growing room’s trash bin. Since v0.4.2, one cleaner can manage six trash cans, though this bungalow layout needs coverage rather than the maximum number of bins.
Tune Mixing Batches, Drying, and Packaging
Once the chain moves correctly, adjust how it handles batches and quality.
Use mixing thresholds that match your output
The Mixing Station MK2 threshold was corrected from 10 to 20 in v0.4.3. Use the station’s current controls when setting batch size.
Choose a drying target deliberately
Drying improves product quality, but it also holds inventory between harvesting and mixing. Set a target quality that meets customer standards without keeping every harvest on racks longer than necessary.
Inspect the whole chain before raising that target:
- Harvests waiting for rack space point to a drying bottleneck.
- Dried product piling up before the first mixer points to mixing or transport.
- Finished mixes waiting near packaging point to packaging supplies, handler workload, or output storage.
Temperature also affects production. Warm temperatures boost plant growth, and since v0.4.3 they can boost drying speed. Use the temperature heatmap when positioning AC units.
Speed Grow can reduce quality. Avoid combining faster production with a drying target that keeps the downstream line waiting for stock.
Keep packaging consistent
Choose baggies or jars for the line and stock that packaging consistently.
Use baggies while serving customers who buy smaller quantities. Switch the packaging supply over together when you change formats, rather than alternating supplies through the same setup.
Check the quantity shown in brackets after a packaged product’s name before collecting an order. That display helps distinguish package count from the number of units inside.
Fix Stalled Production Before Adding Equipment
When a station stops, inspect its inputs and output before buying another one. A missing transport route can leave a fully staffed room idle.
| Symptom | Inspect first | Action |
|---|---|---|
| Botanist does not plant | Wages, supply shelf, seed selection, and pot assignments | Fund the employee and restock the assigned shelf |
| Harvests stay upstream | Drying-rack assignments and pot destinations | Connect each pot group to its rack |
| Dried product remains on storage | Handler route to the first mixer | Correct the pickup and destination |
| Mixer has product but does not run | Ingredient supply and chemist assignment | Supply the ingredient and assign the chemist |
| Second mixer stays empty | First mixer’s output destination | Point it to the second mixer |
| Packaging station stays idle | Product route, packaging route, and handler assignment | Restore the missing supply or assignment |
| Completed output stops moving | Destination storage capacity and access | Clear space and reopen the path |
Walk through one complete batch after setup. Follow the product from the pots until a packaged item reaches the collection shelf.
Then observe the factory across multiple in-game days. Startup inventory can hide a shortage: a station stocked by hand may work initially even though its automated supply route is missing.
Keep bagged sale stock out of employees’ personal inventories. Since v0.4.5, employees other than dealers consume bagged product left there.
Expand Into Meth, Shrooms, and Cocaine
Move into another production line when you can fund its equipment, supplies, and employees while maintaining your existing operation.
The product families require different station chains:
| Product | Core production equipment | Automation roles |
|---|---|---|
| Cannabis | Pots and lights; drying racks for quality improvement | Botanists, plus handlers and chemists when mixing |
| Meth | Chemistry station → lab oven | Handler for supplies; chemist for processing |
| Shrooms | Mushroom spawn station, mushroom beds, and cooling | Botanists handle all production steps |
| Cocaine | Coca plants → cauldron → lab oven | Botanists, handlers, and chemists |
Meth: connect processing stations
Use a handler to supply the chemistry station, assign a chemist to processing, and set the chemistry station’s output to a lab oven.
After the oven, direct the finished product into storage or your mixing chain. Keep the same separation between raw supplies, intermediate output, and packaged stock.
Shrooms: plan cooling and botanist duties
Shrooms enter progression after meth and before cocaine. Their supplier is in the downtown region.
All production steps can be assigned to botanists. The line uses specialized equipment, including mushroom beds and a mushroom spawn station, while AC cooling is necessary for cultivation.
Give this setup its own temperature planning. Heating used to accelerate plants or drying should not undermine the cooling required by mushroom beds.
Cocaine: balance harvesting with processing
Connect coca production to a cauldron, then a lab oven. Botanists handle the plants, handlers move supplies into processing, and chemists operate the stations.
Since v0.4.2, coca plants yield 12 leaves, or 18 with PGR. Account for that harvest volume when planning storage and processing capacity.
For larger factories, the warehouse supports 12 employees, increased from 10 in v0.4.4. Allocate those slots across growing, processing, transport, and cleanup before filling the floor with equipment.
Match Factory Output to Sales
A full finished-stock shelf needs a sales plan. Customers have spending limits and preferences, so a higher product value does not automatically create higher daily revenue.
Watch which products customers order and how much they spend. The contacts app displays most-ordered products and weekly spending, while dealer management shows customer regions and standards.
The October 9, 2026, v0.4.7 update added another outlet for production:
- Four traveling customer groups visit town: Hippies, Party Bus, Businessmen, and Bikers.
- These groups purchase large quantities of their preferred drug types.
Keep stock available for those visits while continuing to supply regular customers. Dealers can serve 10 customers each, increased from eight in v0.4.3.
Use the delivery app’s reorder feature to repeat supply purchases, and watch arrival notifications before shelves run dry. Make restocking part of your collection run: check seeds, soil, mixing ingredients, packaging, wages, and finished-stock space whenever you return.
Expand the stage where inventory repeatedly accumulates. Add growing capacity when downstream stations lack product, improve processing when harvests back up, and strengthen distribution when packaged stock fills the shelves.
Continue exploring
Schedule I Dealers: Best Customer Assignments & Tips
Set up Schedule I dealers with smart customer assignments, learn all six locations, and use the 10-customer limit to spend less time running across town.

Schedule I Special Customers: Groups and Profit Guide
Meet Schedule I special customers, learn what each group buys, plan for each visit, and improve bulk payouts with matching effects and smarter production.
Join the community
Official channels for news, updates and player help: